Monday, May 30, 2022

Time Travels: My Earliest Days of Film Photography

 by Kevin Lane

Last my wife, Debbie, pulled a large plastic tub from underneath our bed and began digging through hundreds and hundreds of photographs (If you are my around my age, you probably have a tub like this as well). She was looking for pictures of our wedding rehearsal to show my youngest daughter, Amber, who currently is planning her own November wedding. However, the search for a single photograph soon turned into a mammoth trip down memory lane of the Lane Family. There were piles of prints scattered on the bed as Debbie attempted to organize the chaos that existed in the photo tub. I made the mistake of walking in the room and was quickly recruited to help, and before long, I too was lost in stacks of handheld memories, some of which date back to before I was born.

As one point Debbie held out an envelope in my direction and said. "You might want to take a look at this." The envelope held about a dozen black and white negatives in 120 format. The film was cut into individual frames, and as I held up one frame to the ceiling light, I realized I was holding one of the very first rolls of film I ever shot. Later, I got out my light table and examined the frames with a loupe. I could see images that dated from around 1969 when I was eleven years old. They were images of Shutter Brother Kelley, me, our younger brother Michael, our family dog as a very young puppy, and our front yard on Vance Avenue in Chattanooga. The light from the light table was projecting the past right into my eyes.

A testament to the past:  This film was actually there.

As I sat at the table looking at these images, all the memories came flooding back. I actual could remember making most of these images, but what I really remember was how Kelley and I got the images from the camera to actual paper. Our Uncle Jonesy had given us a Yankee 18 Piece DeLuxe Home Developing Kit ("Everything you need for truly Professional Quality") for Christmas (you can read more about our experience with this kit here). I distinctly remember us trying to make our small apartment bathroom light tight, rolling the film onto the plastic reels, mixing up the chemicals, and following the instructions to develop the film. When we removed the processed film from the tank,  there was clear evidence that our "darkroom" was not completely dark. Our darkroom techniques left a lot to be desired, nevertheless, and to our amazement, there were images on the film. And now I was staring at those same negatives some fifty-three years later.

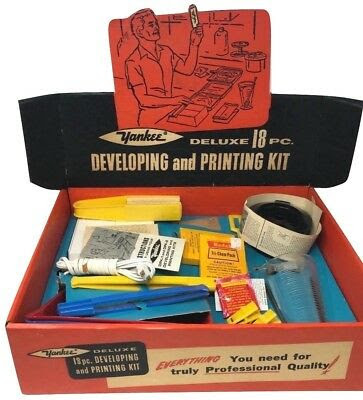
The Yankee 18 Piece Home Developing Kit also included a contact printing light box, photo paper, print chemistry, trays, and tongs. So, when the negatives were dry, we set about making prints from these negatives. I want you to thing about this for a moment. People today frame analog photography as some sort of distant lost magic that is either between extremely inconvenient or damned near impossible to do today. "Wouldn't this be a lot easier with a digital camera?" I hear that one a lot. More than a lot. But here we were, to fifth graders learning how to shoot, develop, and print film in our small bathroom. We were in to it! We bought more film. We shot it. We developed it and made more prints. We were on repeat, and we were hooked. Talk about addictions; we were creativity addicts at the age of eleven.

People say to me now, "Wow, you've really gone crazy with this film photography thing lately." They have no idea. The evidence is in those surviving negatives and contact prints.

Me with our newly acquired puppy, Pogo. Taken by Kelley.

A Pogo portrait.

Me in our front yard with our younger brother, Micheal.

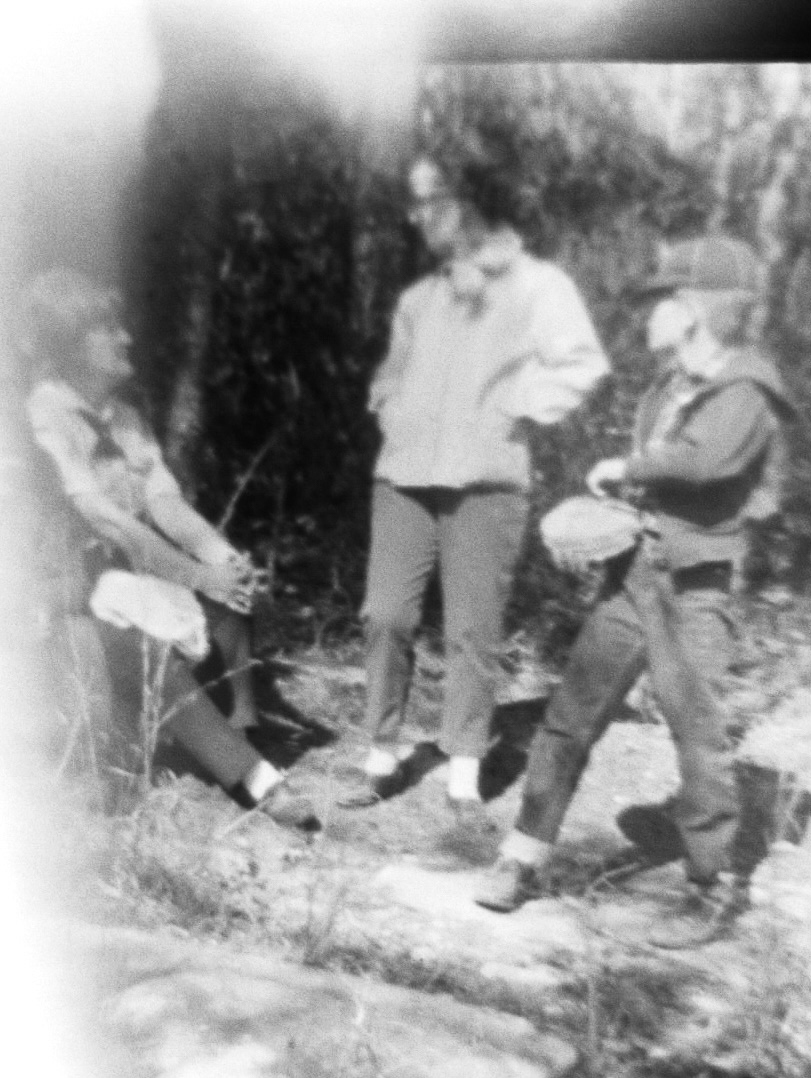
Kelley chatting with two of our den mothers during a Cub Scouts outing.

Bedtime for Michael. Our foray into flash photography.

As I kept digging through the box of photographs, I found more early negatives and prints, and to my amazement, I found some from around my sophomore year of high school. These would have been made four years after our first photographs using the home developing kit. Apparently, photography was not a passing fad to us. Also apparently, we were able to get more chemistry and paper, although I have no idea how or where we got it. But somehow we did.

Aunt Clair (L) and Uncle Jonesy (R) greeting guests at their annual Christmas Open House.
I took this one and the one below. I'm guessing 1971.

Kelley is holdinghis newly acquired Kodak Instamatic X-15 camera.

Uncle Jonesy, my Grandmother, and my Mom at our 8th grade graduation ceremony.
I distinctly remember taking this.

I know the date of this one:  December 25, 1972.
Kelley took this one of me looking over Christmas gifts. 

Kelley with fellow band members at a high school band car wash, fall of 1973. This is a scan from 
and actual contact print.

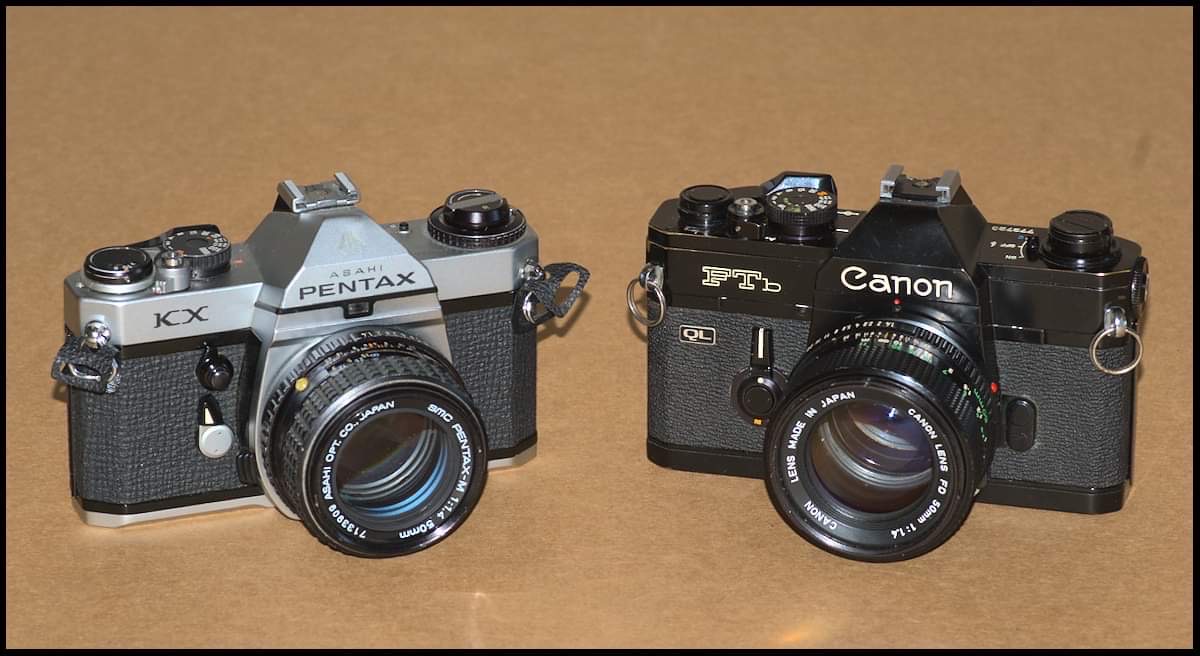
In case you are interested, we likely used two different cameras to make these photographs. Some were made with our parent's Kodak Brownie Hawkeye Flash Model, which we had "borrowed." I think the earliest ones, however, were made with a Diana, a cheap plastic medium format camera made in the 1960's by the Great Wall Plastic Factory of Hong Kong (you can read more about this camera and how I recently found one in it's original box at a local antique store here). As for film, some of it is Kodak (likely Verichrome Pan), but the manufacturer of some of it is a mystery that will likely never be solved.

The two cameras used to make the above images were just like these.

The point of all this is that I am so grateful to have had family members like Uncle Jonesy, who took an interest in us and invested his time and dollars to steer us in a creative and fun direction like photography. His mentorship had a lasting impact, as I am photographing, developing, and printing to this day. And no wonder why I sometimes feel like a kid in the darkroom. It's still just as fun as it ever was. I enjoy it so much that I feel compelled to share what I learn and be a mentor to others, hence the UJC Podcast, this blog, and the teaching work I do for our community darkroom. I don't want my negatives and prints to be the sum total of my photographic legacy. I hope that there will be others who, because of something they heard on the podcast, read on this blog, or learned in one of my workshops, will find a passion for film photography and leave a legacy of their own. Sharing is caring.


Friday, May 13, 2022

Uncle Jonesy's Cameras Podcast #49: It's Testing Time!

When I reach for a roll of film in my refrigerator, I pay attention to the ISO rating and set my camera accordingly. When it is time to develop that roll of film, I look for recommended developing times provided by the film manufacturers. If those aren't provided for the developing I'm using, I look to the online Massive Development Chart. 

But what if the Massive Development Chart either lacks the information I need or provides information that proves to be wrong? And what if my film's ISO rating isn't accurate for the workflow that I have? What do I do now? The answer is to channel my inner Ansel Adams and conduct a series of tests to determine my film's actual exposure index and developing requirements. 

Because I have been experimenting with a home-mixed developer, D-23, which is no longer a commercial developer and is not widely used, I needed to perform tests to determine the proper developing time for (in my case) Fomapan 100 in D-23 (or any film and developer combination). As always, Wayne was an invaluable resource, and in this show, Wayne and I present a testing workflow that will provide useful and reliable information regarding exposure index (the working speed of a particular film based on your workflow), printing times, and film development times. As a companion to the podcast, Wayne has written out his testing procedure, and I included at the end of this post. We hope you find it useful.

Speaking of Wayne, he is thinking about 35mm cameras. Yes, you heard right! Wayne is anticipating the day when he will not be able to carry around his large format gear, and carrying around a 35mm camera will be his medium of choice. But he has a dilemma. Should he use his Pentax KX camera and the extensive system he has built around it, or should he use his newly-acquired Canon FTb, which he came as a gift and has very much captured his fancy. We break down the advantages and disadvantages of each, and we also ask for your input, which you can give by sending us an email to unclejonesyscameras@gmail.com.

Pentax KX or Canon FTb - Help Wayne Decide!

Finally, we read some listener email, including one from Professor Paul "Bear," in which he describes his "Bear-a-Fied" cutting device that cuts 4x5 sheet film down to 3x2. You can see pictures of this device below. 

How do you down 4x5 sheet film down to fit in a 
3x2 film holder? Professor Brown knows how!

Also, we are very excited about our book giveaway, The book is Shooting Film:  Everything you need to know about analogue photography by Ben Hawkins and Liza Kanaeva-Hunsicker, and it was donated to us by listener Shaun Nelson, the author of the fine blog, Utah Film Photography. We will be giving away this book to a listener who either is a newcomer to film photography or knows someone who is. To be eligible for this giveaway, you must email us at unclejonesyscameras@gmail.com and tell who the book would be useful for and why. We will pick a winner on our next show, which will be show #50.

Happy Shooting!


Wayne's Guide to Film Testing


Speed Test: This is to determine your system film speed or Exposure Index (EI). You’ll be making a series of Zone I (the first appearance of tone above black in a print) exposures from 2 stops under to on stop over the film’s rated ISO. You’ll need a roll of film, a smooth neutral tone subject (a gray or black mat board works great), someplace with consistent, soft, even light and your camera mounted on a tripod.


  • Load your camera and attach it to the tripod positioned so that the target fills the entire frame and focus to infinity.
  • Take a meter reading and select a shutter speed and f/stop in a combination that lets you use f/2.8 or f/2. That way you can make all your adjustments using the f/stop instead of shutter speed.
  • Stop your lens down 6 stops, you should be as f/16 or f/22 depending on you initial setting.
  • Make a series of 10 exposures following the chart below. 

  • Once you finish this, you can either finish the rest of the roll normally or go ahead and develop it.
  • Develop the in your standard developer using manufactures recommend time/temp and agitation.
  • Once dry, compare each exposed frame to the adjacent blank frame looking for the first exposure that gives you a slight but noticeable density above the film base. The exposure that produced that exposure is your EI. It’s probably, but not always, going to be less it’s rated ISO.


Print Test: This determines the minimum exposure time to get maximum black on a print by making a test strip of the negative that gave you your EI. 


  • Set your enlarger to a convenient height.
  • Put your EI negative in the carrier so that its edge is in the middle of the frame (the frame should be roughly half exposed film and half clear film). 
  • Focus the negative and stop the lens down about two stops.
  • Make a test strip along the border of the exposed and unexposed film.
  • Once dry, look for the exposure that shows a slight but noticeable difference between the exposed and unexposed film. You may need to make several test strips using different base times and intervals to find the best exposure, when you do, that is your print exposure time.


Developing Time Test: This test helps you determine the developing time that gives you good detail in the highlights by making identical exposures at your system EI and developing at different times. You’ll need a roll of film (preferably 36 exposures), a light-colored textured subject (a clean white towel works great), direct light that brings out the texture of your target, and your camera mounted on a tripod. 


  • Set up your target in the direct light so that there is visible texture and position the loaded camera and tripod so the target fills most of the frame.
  • Carefully focus on the target, you want to see the texture.
  • Set you meter to your newly determined system EI, and meter you target.
  • Set you camera to overexpose 2 stops (open up 2 stops or divide shutter speed by 4).
  • Expose entire roll at the same setting.
  • In the darkroom or changing bag cut the exposed film into 5 pieces, load one strip onto a developing reel and keep the others dark.
  • Develop the first length of film for the manufactures recommend time/temp and agitation.
  • Individually develop the remaining lengths of film:
    • One for 15% less time (multiply original time by 0.85) 
    • One for 30% less time (multiply original time by 0.7)
    • One for 15% more time (multiply original time by 1.15)
    • One for 30% more time (multiply original time by 1.3)
  • Once dry make a print with the same elevation and f/stop you used in the Print Test at the time you determined in the test.
  • Evaluate each print looking for the one that best shows a white subject with distinct texture, that’s your developing time. If it looks like one is too light but the next one is a bit dark, average the times.