

You’re invited to a special holiday gathering for people who love family and film.
Seasons Greetings from The Shutter Brothers!

You’re invited to a special holiday gathering for people who love family and film.
Seasons Greetings from The Shutter Brothers!
The Shutter Brothers are back! We know it has been a while (and Wayne and I have really missed you!), but I've had some family issues to work through, leaving no time for podcasting (or photography, for that matter) until now. So, we have some catching up to do!
Our show begins with a recap of our 2022 Uncle Jonesy's Camera/Safelight District Photowalk at Laurel Snow State Natural Area near Dayton, Tennessee. It was a complete success, and thanks to everyone who participated. We loved seeing your photowalk photos online, and Wayne and I hope to have ours out soon.
Next, I reveal my choices of cameras for my trip to Montreal and Quebec City the first week of December. Yes, you heard right. I will be shooting my Panasonic Lumix LX-5 digital camera for color photography. However, I settled on my Minolta XE-5 SLR for black and white. Find out why in the show.
 |
| My Panasonic LUMIX LX-5, which I’ve had for years but never really enjoyed using until . . . |
 |
| . . . I got the LVF-1 live viewfinder. Now I can use the LUMIX as if it were a “real” camera. 😉 |
 |
| As for b&w, I’m going with classic tried and true. |
Neither Wayne nor I shoot much flash photography, but there are times when flash is a must. Wayne has found a great flash option for his Plaubel Makina 67 medium format camera: the Olympus T32. It has all the functionality Wayne wants, and it looks good, too! Way to go, Wayne! However, over in this corner is Kevin, whose roll of blank film shows what happens when flash is done wrong. Listen to the show to find out how you can avoid making the same mistake.
 |
| Wayne's Makina 67 with Olympus T32 Flash |
 |
| The T32 has a movable head that enables a full range of bounce capability. |
 |
| Another cool flash is the Vivitar 283 with the sensor cord. Put the sensor on the camera and place the flash wherever you want! |
 |
| Believe it or not, if you put a flash unit on the Debonair 120, it's capable of some cool portraits in the style of Francis Wolff. |
Finally, the Shutter Brothers discuss using Etsy as a platform for selling their prints. Does it work and is it worth the time? Listen to find out.
 |
| Kevin's darkroom prints can be found in his Etsy store, Chattalogphotography. |
As always, we love hearing from out listeners. If you want to contribute for a future show, you can send your questions, comments, tips, stories, and even voice memos to unclejonesyscameras@gmail.com. You also can follow us on Facebook and Instagram, and feel free to leave your feedback there.
Now load that camera and capture some holiday magic!
In case you haven't heard, we're having a photowalk! Wayne and I are super excited, and it's just a few days away. Here are all the details:
You can let us know you are coming here.
Next, my wife, Debbie, and I are taking a week-long trip to Montreal and Quebec City in December, so what camera(s) should I bring? The weather will be cold, and there will be lots of walking, so keeping the gear to a minimum is a priority. Fortunately for me, Wayne and our knowledgeable listeners are here to help me decide.
 |
| The Minolta Maxxum 5: a modern choice |
 |
| The Leica ilia: classic vintage |
 |
| Wayne's Canon Canonet QL17 Giii with Canolite D flash |
 |
| The 3A Kodak Series II: a whopper! |
Lastly, the UJC Podcast now has over 400 Instagram followers, and to celebrate, Wayne and Kevin give away prints to two lucky winners.
Thanks to all the listeners who offered camera advice and also those listeners who sent us questions or tips. As far as we are concerned, all of you are on the UJC Team! If you want to contribute for a future show, you can send your questions, comments, tips, stories, and even voice memos to unclejonesyscameras@gmail.com. You also can follow us on Facebook and Instagram, and feel free to leave your feedback there.
Thanks for listening! Now let's get some pitches!

You can get all the details by listening to the show, and you can let us know that you are coming by clicking here. We couldn't be more excited about the prospect of getting to photograph with some of our listeners in person and going to lunch together afterward. If there is anyway you can make it, please consider coming!
In our second segment, Wayne and I read an email from Billy Sanford regarding making negatives that are easier to print. Since both Wayne and I shoot film with the intention of making darkroom prints from our negatives, this question is really important to us. Wayne's helpful tips certainly caught my attention, and they may be of use to you.

We wrap of the show with a contest, and two lucky listeners will receive prints from Wayne and myself. Listen to find out how to win.
As always, we are so very thankful for each and every one of our listeners, and we would love to hear from you. You can send your questions, comments, tips, stories, and even voice memos to unclejonesyscameras@gmail.com. You also can follow us on Facebook and Instagram, and feel free to leave your feedback there.
Thank you for listening! We'll see you at the 2022 Photowalk!
Wayne and I are back with another show that begins with a simple walk in the park. On the morning of the day that we recorded this show, the two intrepid Shutter Brothers met at the North Chickamauga Creek Gorge Trailhead near Soddy Daisy, Tennessee, and had a nice time exploring the beauty of the creek and looking for things that, in the words of Wayne, "want to be photographed." Both Wayne and I exposed two sheets of 4x5 film, and by the time we made it back to our vehicles, we were ready to head to Chattanooga to get some lunch and record a podcast show.

Our second segment is a tale of two developers. First, Wayne, inspired by listener Jr. Wyatt, shares his experience with Thornton's Two-Bath Developer, a developer based on the two-ingredient D-23 that I have been using of late. A complete guide to mixing and using Thornton's Two Bath Developer can be found on the very useful website, Pictorial Planet, which is the work of John Finch.Next, Kevin shares his experience with an environmentally friendly version of his beloved D-76, know as D-76H. Kevin learned of D-76H from a very helpful article by Tim Layton on his website, Tim Layton Fine Art.
In our third segment, we read (and listen to) some great listener feedback while sharing our tips on keeping dust off our negatives. Finally, we make an important announcement about our forthcoming third attempt at the UJC/Safelight District Photowalk.
We can never fully express to you our gratitude for our listeners, and we want you to know that you are are a necessary part of the UJC Team. Therefore, we invite you to take an active role in the content of the show by giving us your feedback. You can send your questions, comments, tips, stories, and even voice memos to unclejonesyscameras@gmail.com. You also can follow us on Facebook and Instagram, and feel free to leave your feedback there.
Thank you for listening! Now let’s go get some pitchas!

Our second segment is a discussion about the tension between the need to be creative on a regular basic versus the lack of inspiration in the form of subject matter. During a recent printing session, it began to dawn on Kevin that while he has a lot of negatives that were indeed fun to make, they didn't necessarily make for good prints in the darkroom. This left Kevin with a very disappointing feeling that the three ring binder in which he keeps his negatives is full of "fuzzy concepts." What to do?! Wayne shares his advice on reaching a balance between actually making photographs and other useful creative photographic activities. If you have ever struggled with creative ebb and flow, you might find Wayne’s advice helpful also.
Finally, Kevin shares his growing interest in making prints using the RA-4 process, to which one might ask, “Is this a good idea given that YOU ARE COLORBLIND?!” Nevertheless, Kevin has been doing A LOT of research, including this very helpful (and dryly funny) video by Gregory Davis, aka The Naked Photographer. Should he go for it?
As always, we are extremely grateful for our listeners m and we would love to have your input for future shows. You can send your questions, comments, tips, stories, and even voice memos to unclejonesyscameras@gmail.com. You also can follow us on Facebook and Instagram, and feel free to leave your feedback there.
Now let’s go get some pitchas!
After taking a midsummer break, the Shutter Brothers are back, and we've got some winners to celebrate. First, Wayne announces the winner of his 35mm system shootout. You may remember from show #50 that Wayne was torn between two different 35mm camera systems. In one corner was his beloved Pentax KX, and in the other corner was a newly acquitted pristine Canon FTb. In that show Wayne discussed the pros and cons of each camera. He even got some help from some of our listeners. Well, "no more calls - we have a winner," and it's . . . (Did you think we would tell you here? Hey, you gotta listen to the show!)
 |
| Canon or Pentax? A decision has been made. |
Meanwhile Kevin has a similar "quarterback controversy" (to borrow a football term) with two able twin lens reflex cameras, his Rolleicord Va(2) and his Yashica-Mat.
 |
| Both are fine cameras, Kevin, but which one is The One? |
Next, Wayne talks about his "butcher cover" lens that appears to be an Otar 58mm f2. But when he "peeled off the cover," he found something quite different.
 |
| Otar 58mm f2 lens in 42mm mount. Or so one might think . . . |
 |
| The ID ring hides a secret past . . . |
 |
| . . . that is revealed when removed. |
Lastly, we announce the winner of our book giveaway! And thank you to Shaun Nelson of Utah Film Photography fame for donating this fine hardback book so that we could give it away. Yay!
 |
| An excellent guide for the newcomer to film photography. |
As always, we here at Uncle Jonesy's Cameras would love to hear from you, so send us an email at unclejonesyscameras@gmail.com. You also can find us on Facebook and Instagram.
Happy Shooting!
In a ratio of 2:1, I have shot more black and white film than I do color. If you look at my photography since I retired from teaching music at a public elementary school, the ratio would be more like 4:1. Nowadays, the only occasions I shoot color film are:
1. family gathering
2. garden walks
My color film workflow differs from my black and white film workflow, in that I always scan my color film. Since I got serious about darkroom printing more than two years ago, I no longer scan my black and white film. Why? Because I do not allow the scans to have the final say on what my photography looks like. That job goes to the darkroom prints I make. If you see a photography of mine online, chances are that you are seeing a scan of the print, not the negative.
There are disadvantages to this. The biggest one is that the majority of my images do not see the light of online day. In the past, I would post any image that I thought half decent. Now, you only see the ones I print in the darkroom. If you follow Uncle Jonesy's Cameras Podcast on Instagram and Facebook, you probably think that I am shooting less and less these days. In fact, I shoot about the same as I always have, and I develop every roll either at home (B&W) or at my community darkroom (color). But I only share the images I deem worthy to print, and I have quite a backlog of those. It's easy to load a camera and photography. Printing takes time and perseverance. I love it.
 |
| Garden Friend, Gibbs Gardens near Ball Ground, Georgia I'd love to print this someday. |
 |
| Autumn Leaves, Union City, Georgia. Another one I'd love to print. |
 |
| Garden Girl and her Dog, Gibbs Gardens near Ball Ground, Georgia. Surely I can make a better print of this than my scanner did. |
So, I must be certifiably insane to think that I can perform the necessary color evaluations and corrections when making color darkroom prints. Perhaps this is a really bad idea. But hey! I'm retired. I've got some time. Why not look into it and do some research. It's not rocket science, is it?
Is it?
 |
| Jobo 2840 Print Drum. I took it home, cleaned it up, and now it's ready for use. |
Ok, so acquiring all this and learning the process does not mean I will be able to get the colors right and make decent prints. I know this. However, I do know someone with perfect color vision, and this person happens to be my wife. I know she will be glad to help. And I going to need help.
Lots of it.
To conclude, I definitely am at the thinking stage. I am doing my research and looking around for equipment. I haven't gone as far to make any purchases, yet, but maybe that will come soon.
We'll see.
Stay tuned . . .
by Kevin Lane
Last my wife, Debbie, pulled a large plastic tub from underneath our bed and began digging through hundreds and hundreds of photographs (If you are my around my age, you probably have a tub like this as well). She was looking for pictures of our wedding rehearsal to show my youngest daughter, Amber, who currently is planning her own November wedding. However, the search for a single photograph soon turned into a mammoth trip down memory lane of the Lane Family. There were piles of prints scattered on the bed as Debbie attempted to organize the chaos that existed in the photo tub. I made the mistake of walking in the room and was quickly recruited to help, and before long, I too was lost in stacks of handheld memories, some of which date back to before I was born.
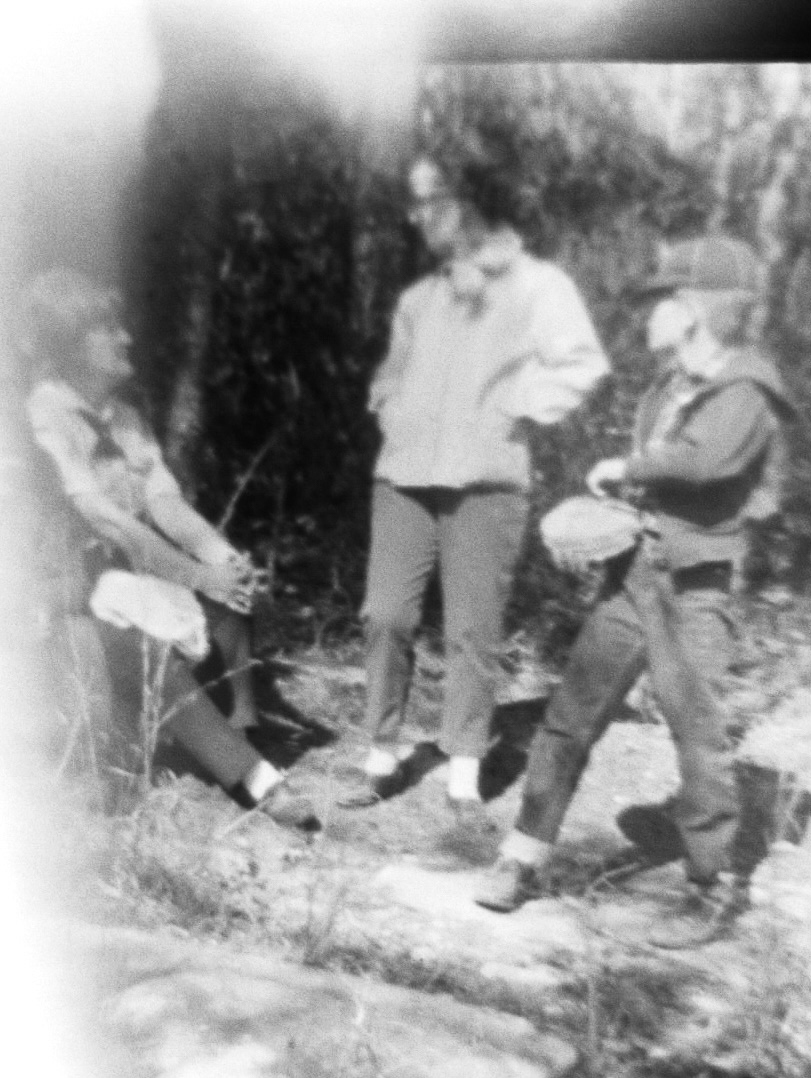
As one point Debbie held out an envelope in my direction and said. "You might want to take a look at this." The envelope held about a dozen black and white negatives in 120 format. The film was cut into individual frames, and as I held up one frame to the ceiling light, I realized I was holding one of the very first rolls of film I ever shot. Later, I got out my light table and examined the frames with a loupe. I could see images that dated from around 1969 when I was eleven years old. They were images of Shutter Brother Kelley, me, our younger brother Michael, our family dog as a very young puppy, and our front yard on Vance Avenue in Chattanooga. The light from the light table was projecting the past right into my eyes.
 |
| A testament to the past: This film was actually there. |
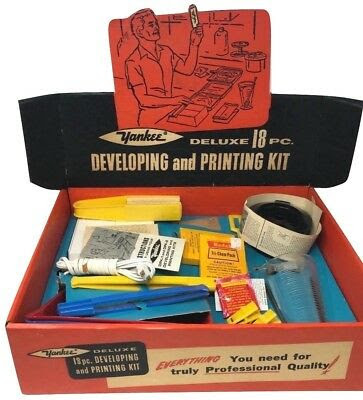
The Yankee 18 Piece Home Developing Kit also included a contact printing light box, photo paper, print chemistry, trays, and tongs. So, when the negatives were dry, we set about making prints from these negatives. I want you to thing about this for a moment. People today frame analog photography as some sort of distant lost magic that is either between extremely inconvenient or damned near impossible to do today. "Wouldn't this be a lot easier with a digital camera?" I hear that one a lot. More than a lot. But here we were, to fifth graders learning how to shoot, develop, and print film in our small bathroom. We were in to it! We bought more film. We shot it. We developed it and made more prints. We were on repeat, and we were hooked. Talk about addictions; we were creativity addicts at the age of eleven.
People say to me now, "Wow, you've really gone crazy with this film photography thing lately." They have no idea. The evidence is in those surviving negatives and contact prints.
 |
| Me with our newly acquired puppy, Pogo. Taken by Kelley. |
 |
| A Pogo portrait. |
 |
| Me in our front yard with our younger brother, Micheal. |
 |
| Kelley chatting with two of our den mothers during a Cub Scouts outing. |
 |
| Bedtime for Michael. Our foray into flash photography. |
 |
| Aunt Clair (L) and Uncle Jonesy (R) greeting guests at their annual Christmas Open House. I took this one and the one below. I'm guessing 1971. |
 |
| Uncle Jonesy, my Grandmother, and my Mom at our 8th grade graduation ceremony. I distinctly remember taking this. |
 |
| I know the date of this one: December 25, 1972. Kelley took this one of me looking over Christmas gifts. |
 |
| Kelley with fellow band members at a high school band car wash, fall of 1973. This is a scan from and actual contact print. |
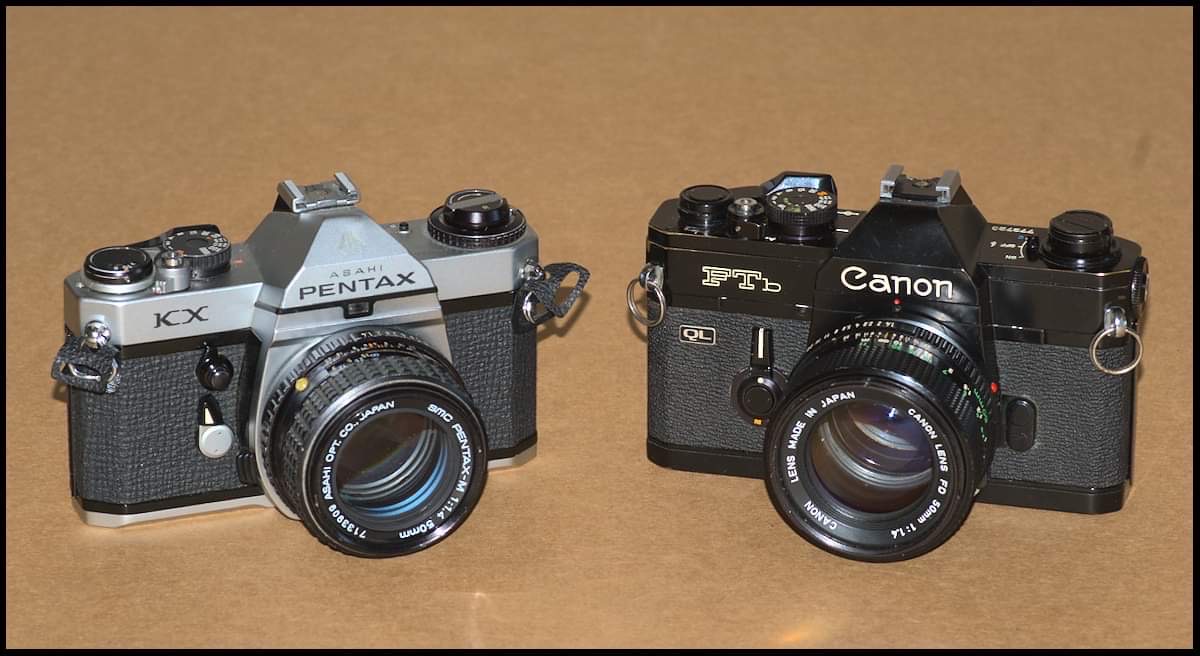
In case you are interested, we likely used two different cameras to make these photographs. Some were made with our parent's Kodak Brownie Hawkeye Flash Model, which we had "borrowed." I think the earliest ones, however, were made with a Diana, a cheap plastic medium format camera made in the 1960's by the Great Wall Plastic Factory of Hong Kong (you can read more about this camera and how I recently found one in it's original box at a local antique store here). As for film, some of it is Kodak (likely Verichrome Pan), but the manufacturer of some of it is a mystery that will likely never be solved.
 |
| The two cameras used to make the above images were just like these. |
The point of all this is that I am so grateful to have had family members like Uncle Jonesy, who took an interest in us and invested his time and dollars to steer us in a creative and fun direction like photography. His mentorship had a lasting impact, as I am photographing, developing, and printing to this day. And no wonder why I sometimes feel like a kid in the darkroom. It's still just as fun as it ever was. I enjoy it so much that I feel compelled to share what I learn and be a mentor to others, hence the UJC Podcast, this blog, and the teaching work I do for our community darkroom. I don't want my negatives and prints to be the sum total of my photographic legacy. I hope that there will be others who, because of something they heard on the podcast, read on this blog, or learned in one of my workshops, will find a passion for film photography and leave a legacy of their own. Sharing is caring.
When I reach for a roll of film in my refrigerator, I pay attention to the ISO rating and set my camera accordingly. When it is time to develop that roll of film, I look for recommended developing times provided by the film manufacturers. If those aren't provided for the developing I'm using, I look to the online Massive Development Chart.
But what if the Massive Development Chart either lacks the information I need or provides information that proves to be wrong? And what if my film's ISO rating isn't accurate for the workflow that I have? What do I do now? The answer is to channel my inner Ansel Adams and conduct a series of tests to determine my film's actual exposure index and developing requirements.
Because I have been experimenting with a home-mixed developer, D-23, which is no longer a commercial developer and is not widely used, I needed to perform tests to determine the proper developing time for (in my case) Fomapan 100 in D-23 (or any film and developer combination). As always, Wayne was an invaluable resource, and in this show, Wayne and I present a testing workflow that will provide useful and reliable information regarding exposure index (the working speed of a particular film based on your workflow), printing times, and film development times. As a companion to the podcast, Wayne has written out his testing procedure, and I included at the end of this post. We hope you find it useful.
Speaking of Wayne, he is thinking about 35mm cameras. Yes, you heard right! Wayne is anticipating the day when he will not be able to carry around his large format gear, and carrying around a 35mm camera will be his medium of choice. But he has a dilemma. Should he use his Pentax KX camera and the extensive system he has built around it, or should he use his newly-acquired Canon FTb, which he came as a gift and has very much captured his fancy. We break down the advantages and disadvantages of each, and we also ask for your input, which you can give by sending us an email to unclejonesyscameras@gmail.com.
 |
| Pentax KX or Canon FTb - Help Wayne Decide! |
Finally, we read some listener email, including one from Professor Paul "Bear," in which he describes his "Bear-a-Fied" cutting device that cuts 4x5 sheet film down to 3x2. You can see pictures of this device below.
 |
| How do you down 4x5 sheet film down to fit in a 3x2 film holder? Professor Brown knows how! |

Happy Shooting!
Wayne's Guide to Film Testing
Speed Test: This is to determine your system film speed or Exposure Index (EI). You’ll be making a series of Zone I (the first appearance of tone above black in a print) exposures from 2 stops under to on stop over the film’s rated ISO. You’ll need a roll of film, a smooth neutral tone subject (a gray or black mat board works great), someplace with consistent, soft, even light and your camera mounted on a tripod.

Print Test: This determines the minimum exposure time to get maximum black on a print by making a test strip of the negative that gave you your EI.
Developing Time Test: This test helps you determine the developing time that gives you good detail in the highlights by making identical exposures at your system EI and developing at different times. You’ll need a roll of film (preferably 36 exposures), a light-colored textured subject (a clean white towel works great), direct light that brings out the texture of your target, and your camera mounted on a tripod.
 |
| Wayne's Plaubel Marina 67 and some first prints |
So, UJC Podcast #48 begins with a discussion over how format effects approach, with Wayne and I each describing how we approach photography when using formats we do not usually use. In addition, Wayne give us a rundown of the Paubel Making 67, a medium format camera that Wayne has been using in preparation for times when he can't use his 4x5 camera. It's definitely a keeper camera!
Next, I relate how I ran into a major roadblock when I first began printing enlargements of the 4x5 negatives I have been making lately. I already knew about diffuser enlargers and how they differed from the condenser enlarger I''ve been using in our community darkroom. However, I didn't know anything about cold light heads, and it turns out that the 4x5 enlarger at our community darkroom has one, and it's a diffuser head to boot! In the show I share what I learned about these light sources and how I found a solution to the problems they can cause.
 |
| A diffuser . . . |
 |
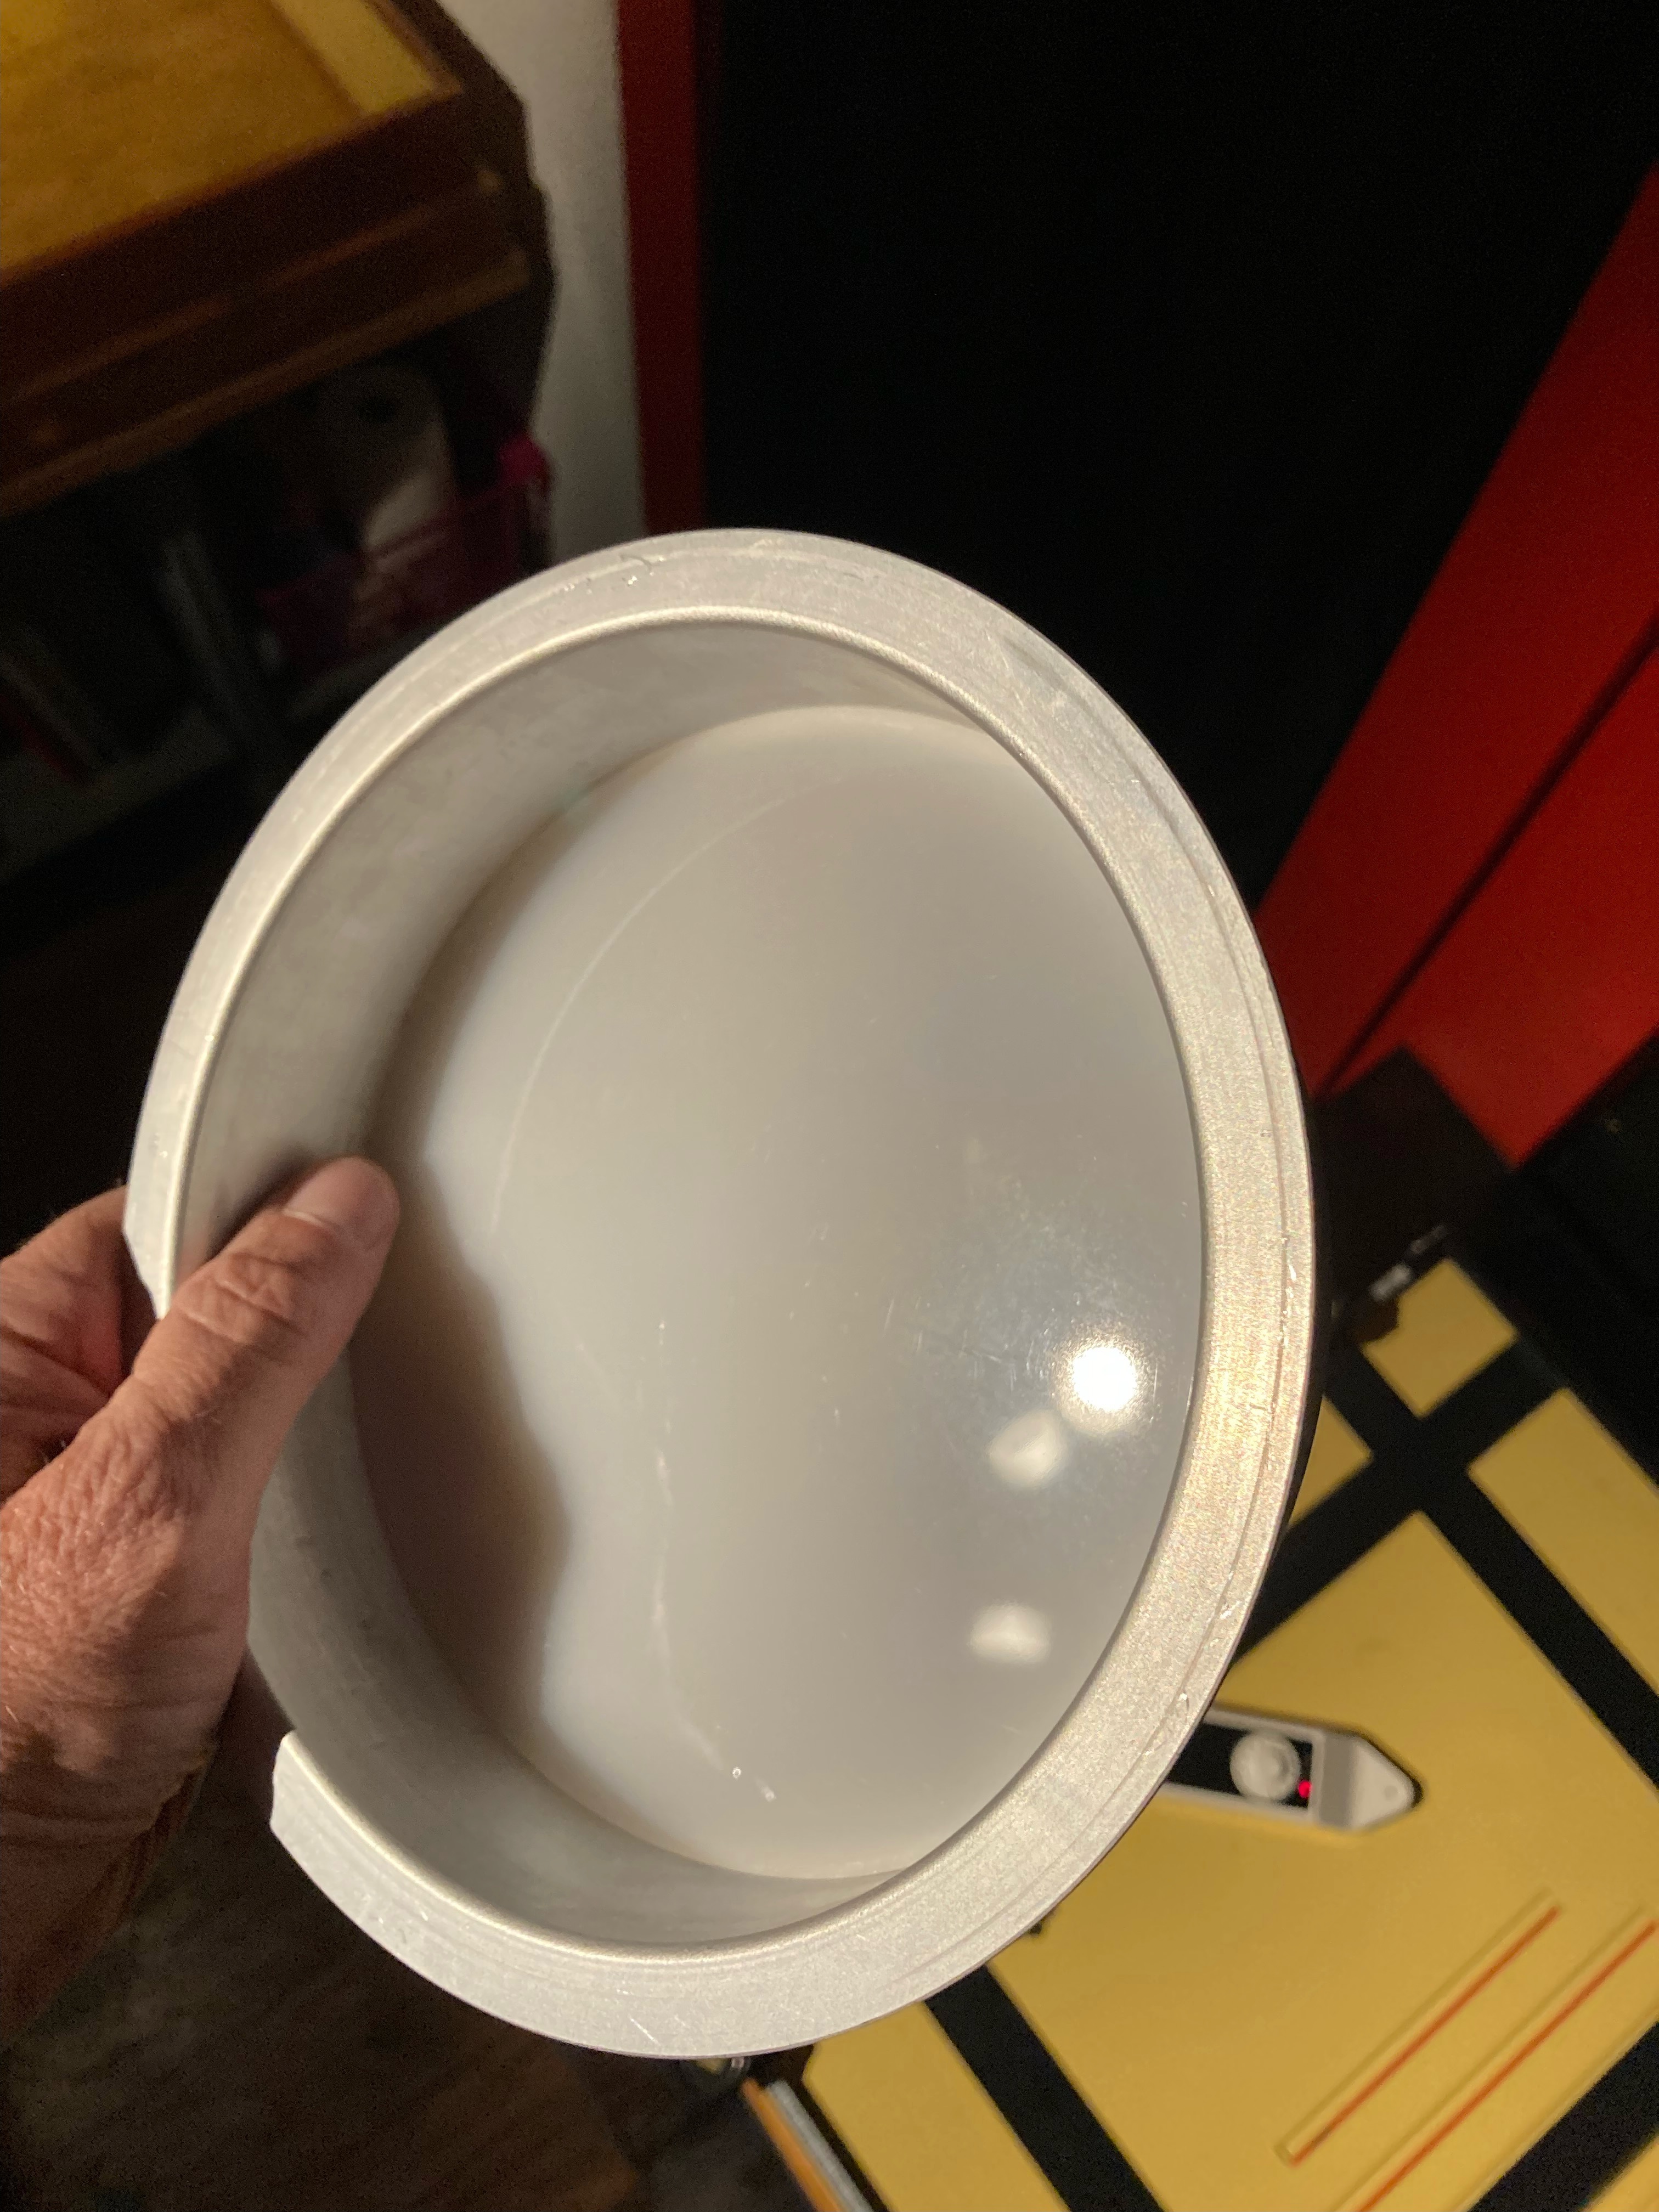
| . . . and the blue light of cold head mean that variable contrast filters will be useless. (The green strip is the result of frequency mismatch that happens when trying to photograph a fluorescent light.) |
 |
| Solution: a condenser head with a tungsten light source. |

1. Entries must be submitted by email to unclejonesyscameras@gmail.com
2. Entries must come from newcomers to film photography or . . .
3. Entries must come from experienced film photographers who already know of someone who could benefit from this book.
4. Entries must explain why they (or a friend who is a film beginner) need this book and what they would like to learn from it.
Wayne and I will consider all the entries and choose the entry that best explains why the book is needed and how it will be used.
Good luck, and here is the link to Shaun's review of the book.
In the show I mention the excellent exhibit of photographs by the well-known American photographer Bruce Davidson at the Jepson Center in Savannah, Georgia. It lasts through May 1, 2022, and it is well worth your time if you can get there. https://www.telfair.org/exhibitions/bruce-davidson-face-to-face/
Until next time, Happy Shooting!
